Showing posts with label Organization. Show all posts

Wednesday, January 1, 2014

Camera Words Sight Word Folder System

As we all gear up to head back into our classrooms in the next week, I wanted to share how my system for managing sight word progress has worked wonders for my students and I this year!

There's a Cutie-Patootie little FREEBIE at the end of this post...so be sure you read all the way to the end.  :)

You may or may not know that I teach half-day kindergarten, so time is a HUGE concern for me!  I was feeling frustrated because I just couldn't keep up with monitoring my students' sight word progress.  I knew I needed a system.  But, it had to be efficient and streamlined - or it would never work for me!  So, I got to work and created my new...


My students and I call sight words "Camera Words" because students should be able to recognize them "in a FLASH"!!

With this Sight Word Folder System, I have been able to quickly and efficiently track and monitor the progress of ALL students on a weekly basis...in just a few minutes a day!  My kids have made incredible progress and have been SO PROUD of themselves!  This program makes the task of learning sight words manageable, meaningful, and FUN!!  

 Camera Words BUNDLE on TPT

My Camera Words Sight Word Folder System breaks down the most common sight words (Dolch words) into weekly word lists, with review lists and a final list included to ensure MASTERY!  Easy-to-use forms for Assessment and Progress Monitoring are included.

When I created this program, I knew I wanted to be ale to seamlessly DIFFERENTIATE so my students could make progress at their own pace.  I like how every student has a folder and all the pages look similar...so it's not obvious which students are on an intervention level and which are on an enrichment level.  

The bundle includes the Pre-PrimerPrimer, and 1st Grade word sets.

I designed this program to be used as a "folder system", which makes School-Home Communication a snap!  However, the folder system WORKS even if you choose to only use it at school.  It will make it very quick and easy for you to differentiate your work work activities and provide targeted practice for students at school!


Here's How...

I like to use inexpensive, fun folders with bright colors and patterns to make my Sight Word Folders.  I found these fun folders in the Target Dollar Spot in a 3-pack for $1.  Not bad!  But, you could also use regular file folders and cover the stapled edge with a funky strip of duct tape to add some fun.  :)  

Print off the pages, insert them into the file folder, staple securely across the top, and you're set!  I provided covers (as shown in the picture) that you can attach to the front of the file folder...but that's completely optional. 

I like to send home a set of flash cards with each student.  I copy them on cardstock so they last.  However, I teach the students lots of "games" they can play with the flash cards and I make sure to continually remind parents to avoid "drilling" the sight words with the flash cards.  I included the list number on the bottom corner of each card, for management and organizational purposes.  :)


Again, I prefer using a folder because it's super easy to get from school to home and back again.  I can also collect the folders for progress monitoring without having to have a stack of binders on my desk.  However, if you already use a Daily Binder with your students, you may want to just add a "Camera Words" section to the binder.  :) Easy-Peasy-Lemon-Squeezy!!  

When I created this system I knew I wanted it to be a tool to ENGAGE and EMPOWER parents to help their children master sight words at home.  So, I included a parent letter that you can use for the introduction page of the sight word folder. . It gives parents the scoop on why sight words really matter and sets the tone for a positive partnership!  I like to sign each letter at the bottom, just to add a personal touch.   

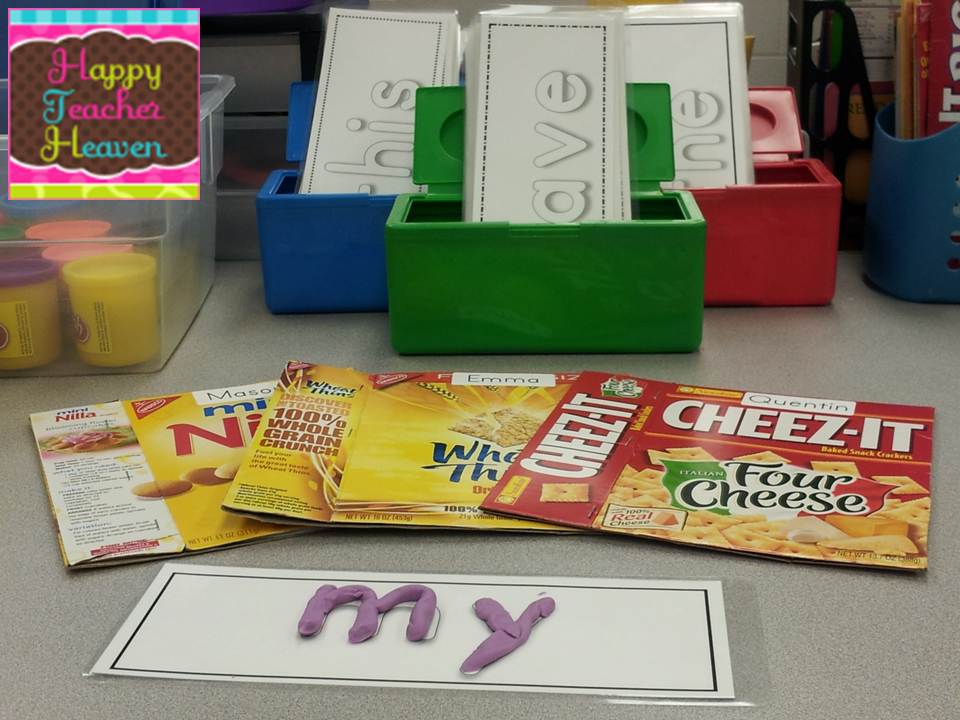
I wanted to equip parents with the tools they would need to make sight word practice more meaningful and engaging.  So, I included a list of suggested activities for practicing sight words.  These fun, hands-on, and interactive strategies make it a "SNAP" for parents to help their children at home!


I broke down the Dolch words into lists of 5-6 words.  My goal is for students to master one list each week.  Students practice the words both at home and at school throughout the week.  When they have mastered a list, they put their folder on my desk during our "arrival" routine.  Then, throughout the day, when I have a minute, I'll pull a student over to my desk and check their progress. 

I tend to just use the stopwatch feature on my phone when assessing because my phone is usually within reach.  But, you could use any sort of timer.  I generally have students just read the words to me directly from the folder.  But, you could use the flash cards (provided) instead if you prefer.  I record their data directly on the folder for parent communication and progress monitoring purposes.  I also transfer the data onto my own spreadsheet, but I like having all their data in front of me when I'm assessing.
I use the checklist in the front of the folder to keep a running record of the student's progress at-a-glance.  It also serves as a "certificate" when the student has mastered all of the words.

I have received RAVE REVIEWS from parents about this program!  They absolutely love how manageable it is.  The Camera Words system creates a predictable routine that families can incorporate into their busy schedules.  Most importantly, I'm getting AWESOME RESULTS!  All but 2 of my kindergartners have moved on to 1st grade words before winter break!!  I hope you'll be able to use this system to BOOST student learning, engage parents, and save time!! :)


Best of all...you can get the BUNDLE for 50% OFF!!
I'm keeping it discounted until Friday, January 3rd...so don't delay!!

And, now here's your FREEBIE! Enjoy!!  :)


Sunday, April 28, 2013

Happy GLUE Heaven!!

You might be a kindergarten teacher if... 
the mere mention of the word GLUE makes you twitch.


Save your Sanity with this Quick Fix!!

All you need is:
1 medium Sterilite basket
2 small drawer organizers


Easy Peasy...Lemon Elmer's Squeezy!!


I love this system!!
My sweet kinders absolutely LOVE keeping our glue "happy".

Here's a cutie-patootie little label for the front of your "Happy Glue" Basket!!
Just click the picture below to download a copy for yourself.  :)

And, now I want to know how YOU keep glue from threatening your sanity.
Tell me all about it!!

Classroom Freebies Manic Monday

Wednesday, March 20, 2013

Displaying Student Work: Lattice

When designing my classroom wall space,
my first priority is a place to display student work!  

As teachers, we know that students (and their families) feel more 'at home' in our classrooms when the walls surrounding them are personalized by student work.  Students also feel so proud to have their work on display!  And for me, when I walk into my classroom {even when my desk is piled sky high and my centers look like a natural disaster area} my eyes immediately go to the colorful student work on the wall!!  I can only hope the same is true for the visitors to my classroom...and that they realize learning is messy sometimes!  

Unfortunately, I don't have a lot of wall space in my kindergarten classroom.  I'm lucky to have a lot of cabinets and cubbies, but they come at the expense of wall space.  I also have huge curtain wall between my classroom and the classroom next door.  This makes it difficult to find the space to create student work displays.

Fortunately, my teammates had the perfect solution!

I went to Home Depot and purchased 2 pieces of plastic lattice.  Each piece is 4' x 8' and costs about $20/sheet.  You definitely want some help getting them moved and hung!  My Mom and Dad help me get my classroom set up each year.  I'm so thankful for their help because I could never have done this on my own!!  (Sorry about the glare...ya' gotta love fluorescent lighting!!) 

Each sheet is hung with 3 pieces of sturdy (and cute, color coordinated) ribbon and metal ceiling hooks.  I already had my hooks, but I'm sure you can find them at the hardware store.  I had some plastic ones that I purchased at a teacher store, but I worried they would break.  Since this is hanging right over my literacy station area, I wanted to be sure the sheets were secure!  

Here is a close-up of the ribbon and hooks:

My sweet Momma worked really hard making sure the ribbons were exactly the right length so that the lattice would hang straight.  This is REALLY important!  Because the lattice is plastic - obviously - it bends.  So, if you don't hang it just right, it will ripple.  That's the kind of thing that drives me CRAZY...so we worked really hard until we got it just right!  You can see from the first picture that there is a little ripple in the first sheet, but it looks worse in the photo than in really is.  I was trying to get the whole wall in the photo, so it was a weird angle.  It's not that noticeable from a normal vantage point.

I use colorful little clips that I found in the Dollar Spot a few years ago to hang student artwork on the lattice.   But, clothespins work great, too.  I love how simple it is to change out the projects that are on display!  No hot glue or masking tape!!  :)  HOORAY!!  I can change out the projects in about 5 minutes.  :) 

Since pocket chart stands take up soooo much space, I love using the bottom of the lattice to hang pocket charts for students to use during literacy stations.  I didn't get a terrific picture of this, but you can get the idea by looking at the picture below.  Again, I just use little clips to hold it on.  It works like a charm and is just the right height for my kinders!!  


I've seen other teachers hang the lattice vertically and perpendicular to the wall to create a little "mini-wall" or "cubby" between stations.  However, my guided reading table is so far away from my station area that I felt like it limited my ability to supervise the area.  But, it's a great idea if your classroom set-up will allow it! 

Even if you don't have a curtain wall, I would really recommend displaying student work on lattice if you have any kid of large wall space to cover.  From a convenience standpoint - it can't be beat!!  Putting up and taking down artwork is a snap!  And, I think it provides a pretty backdrop that makes the students' work stand out in a special way, too!!  

Do you have an Open House or Celebration of Learning coming up this spring?  If so, this might be just what you need to put a fresh spin on your classroom displays!!  And, when August rolls around, you'll be thanking yourself that you got this project done early!

Make sure to pop over and enter my Sight Word Snapshot Bundle GIVEAWAY!!  


Thanks for stopping by!

Thursday, February 21, 2013

Rolling in the Dough! (FREEBIE!!)

The Play-Dough Station is always a favorite!!  I love that there are infinite ways to increase the depth and complexity of the tasks, while encouraging creativity and active engagement.  I'm so excited to share my version of the Play Dough Station with you and to hear about yours!  (Hint:  If you read all the way to the bottom, there is a FREEBIE for you!!)


This is my Play Dough Station table.  There is enough room for 2-3 students to work comfortably.  I'm lucky to have a classroom that is half carpet and half tile.  Of course, the Play Dough table is located on the tiled floor.  I try to make sure everything the kids "knead" is right at their fingertips!

Play Dough Storage 
I have a large Sterilite tub with a wide variety of color choices.  I love that the tub is clear, so I can quickly check to be sure the lids are all snapped in place and put away neatly.  I haven't tried making my own Play-Dough yet. But, I've been pinning recipes to try when my current supply runs out or dries up.


Sight Word Cards
My kinders are expected to master 50 sight words.  Our sight word list is a blend of Dolch and Fry words.  The sight word cards are grouped and designated by varied border designs (solid, dashed, and dotted).  This allows me to differentiate the work kids do at this station based on their level of mastery.  I separated each group of sight words into a different color bin so students can easily find the words they need to work on and can get started right away!  Gotta maximize those instructional minutes!


If you'd like a set of these cards for your own classroom, click the picture below to check them out.  I put them ON SALE for HALF PRICE for a limited time!!  What I love about these cards is that they don't require color printing.  This is good for me because my school has pretty strict limits for color printing.  I only use it when it's absolutely essential.


Box Journals
These fun box journals are dearly loved by my kids!! I beg nicely ask my friends, family, and students' families to save up their boxes and send them to me at school. I use the cereal size box for a writing journal and cracker size boxes for word study journals. I store them in the blue plastic basket so they are easily accessible.  Each student was able to pick out his/her own journal.  Because the boxes are (mostly) all different, it's very easy for Kinders to locate their own journal quickly and without frustration.  At the beginning of the year, this is a great way to practice reading environmental print!


Inside the front cover of the box, I place a red, blue, or red colored dot sticker (like the kind you use at a garage sale.)  The sticker provides a private way to help the student remember which set of words to practice.  When a student has mastered all the words for the quarter, I draw a happy face inside the dot and place the next color on their journal.


When the kids are practicing sight words at the Play Dough Station, they select a card from the assigned colored tub.  Students read the word to their station partner, form the word with play dough, trace it with their finger and spell it out loud.  Then, they write the word in their journal and move on to the next card.  Partners are working independently, but stop to coach one another on reading the words.  At the end of the center, each student reads his/her journal page to their partner before cleaning up and moving to the next station or classroom activity.

I change-up the play-dough station every 3 weeks to include letters, sight words, word families, CVC words, etc.  I have some of the Lakeshore Lowercase Alphabet Dough Stampers and my kids love to use them with the Word Work Packs from Kindergarten Works.

FREEBIE!!
I created a set of colorful Color Word Play Dough cards.  Click the picture below to download them for FREE from my TPT store!  If you download them, I hope you'll consider returning the favor by following my TPT store and leaving feedback.
I'm excited to hear about how your Play Dough station works!!


Related Posts Plugin for WordPress, Blogger...